As I recently found out, claiming Bitcoing Gold from Electrum wallets by importing the seed is not possible because Electrum use a custom algorithm for deriving the seed words that is not compatible with the ‘industry standard’ BIP39.
However, I discovered a way to claim BTG from Electrum using the Coinomi wallet and bitaddress.org. It requires a lot of manual operations and might be impractical if you want to reclaim BTG from multiple addresses on a well-used Electrum wallet, but I only had to work with ~40 addresses, and it took me less than 10 minutes to do everything. Here is what you need to do.
First and most important: if you keep Bitcoins on the same address(es) which you will claim BTG, move them to a different BTC wallet/address. BTG splitting requires direct access to your private keys and you should consider them compromised and unusable from that point onwards; that is why you must move your BTC funds elsewhere. Do not proceed past this sentence until you have moved your BTC safely to a different wallet.
To get your Bitcoin Gold, you need the following:
- Access to your Electrum wallet(s) that have had balances prior to block 491406 mined around 1:17am UTC on 24. October 2017
- A text editor
- A working copy of Coinomi on your Android mobile device (sorry, no iOS or desktop version…)
In summary, you have to do the following: (1) Extract all private keys from the Electrum wallet; (2) Expunge the keys that can’t have BTG balance (spent/unused); (3) Generate a BTG wallet in Coinomi; (4) Sweep remaining keys into the BTG wallet. A full description of each step is given below.
Step One: Extracting keys from Electrum
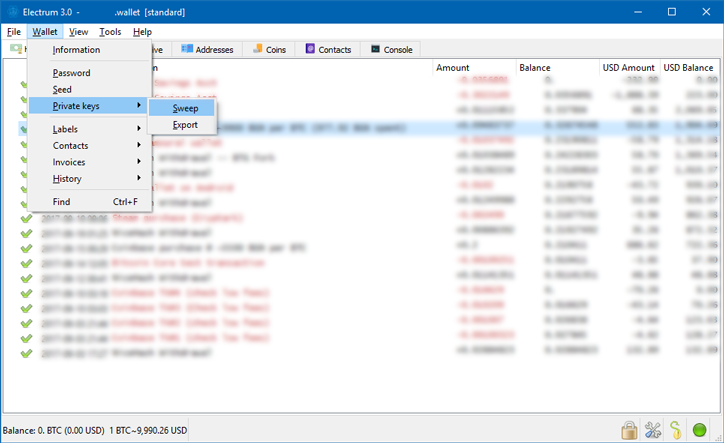
- Open Electrum and go to
Wallet → Private Keys → Export. - Select location for the export file and choose CSV format.
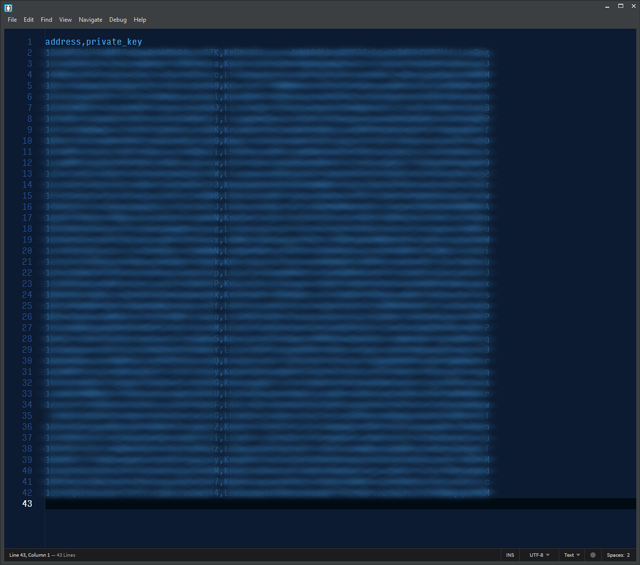
- After export is finished, open the CSV file in the text editor.
Step Two: Eliminating empty (unused or spent) addresses
The CSV file contains all addresses and their matching private keys. They are listed there, comma separated, one pair on each line and are sorted by generation date (oldest on top). This order will become important later.
The problem with the export procedure is that Electrum will only allow you to export all address/key pairs and will not provide you with the ability to select only keys that have been used and keep any balance that you want to convert to BTG.
If you remove all address/key pairs that have not been used, you will save time matching the rest of them later. So first you need to identify the addresses you should keep.
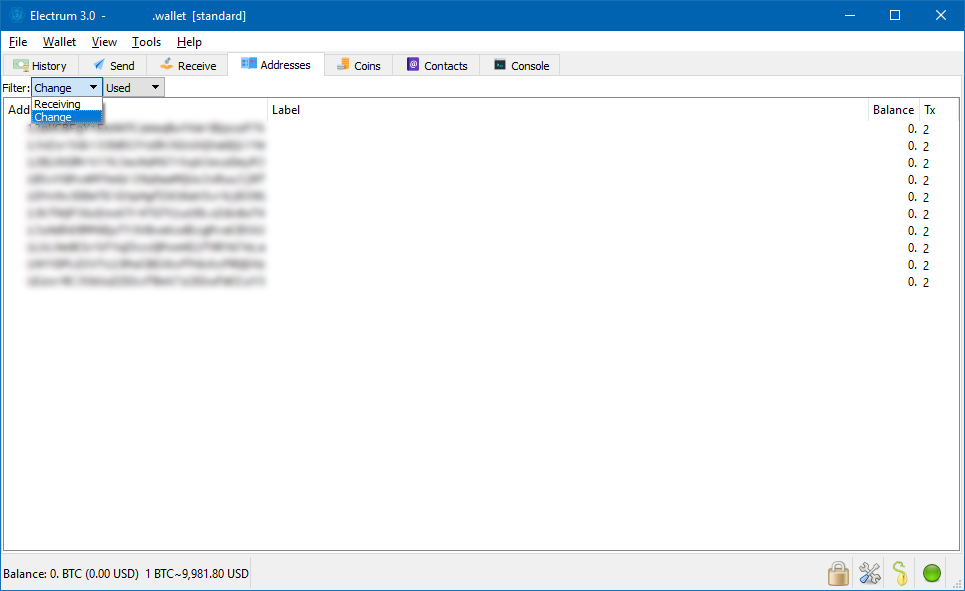
- Go to the Addresses tab (if not visible, go to
View → Show Addressesfirst) - From the
Filterdropdown, selectReceivingand thenUsed - Go back to the CSV file and locate the addresses from the Used list in Electrum, and copy their matching private keys to another text file. I’ll refer to this second file as ‘the shortlist’.
- Repeat the procedure for change addresses (from the
Filterdropdown, selectChangeand thenUsed - Go back to the CSV file again and transfer to the shortlist all private keys corresponding to the used change addresses.
Step Three: Preparing Coinomi
Before proceeding further, go to the Coinomi help desk website and read this support article. It will give you instructions on how to prepare your wallet to accept the new coins.
Once you have created a BTG wallet, all you have to do is sweep all keys in the shortlist you have prepared. Depending on your level of comfort, you may send the shortlist file to your phone or tablet and enter each key by hand, but that is slow and prone to errors (you may miss a key). That is why instead I chose to use bitaddress.org to generate QR codes for all private keys.
A word of caution: as with all things crypto-related, you are advised to treat all websites as evil and assume that everybody is trying to steal your private keys. I generally strongly advise against putting a Bitcoin private key into any website for any reason.
However, in this very particular case, you can afford to be a little less stringent. You operate only on spent/empty Bitcoin addresses (so even if compromised, no money can be stolen from them), and they are vulnerable very briefly. The process of generating a QR code for each address, scanning the code with Coinomi, and moving the BTG balance takes less than 10 seconds per address — this is the whole window of opportunity for BTG theft.
Also consider that even if bitaddress.org was compromised, a hacker — who let’s assume happens to be online at the moment you submit your keys and snags them immediately — has no way of knowing you’re trying to transact BTG and is much more likely to try to sweep the key for BTC to look for a larger reward. As long as you remember that the keys on the shortlist are potentially leaked and never use them again to transact on any blockchain, your coins are not threatened.
Step Four: Generating QR Codes and Swiping Keys

The only thing that remains to be done is to generate a QR code for each private key and sweep that key into Coinomi. Here is how to do it:
- Go to bitaddress.org and click on
Wallet Details - In the
Enter Private Keyfield, paste the first key from your shortlist, then click onView Details - The website will generate a total of four QR codes: two for the address (the public key) and two for the private key. You need to use the last one (called
Private Key WIF Compressedbecause this is the format Coinomi understands) - Grab your phone and open your Bitcoin Gold wallet on Coinomi. From the menu in the top-right corner, select
Sweep wallet - Tap on the QR icon and scan the QR code generated in step 3.
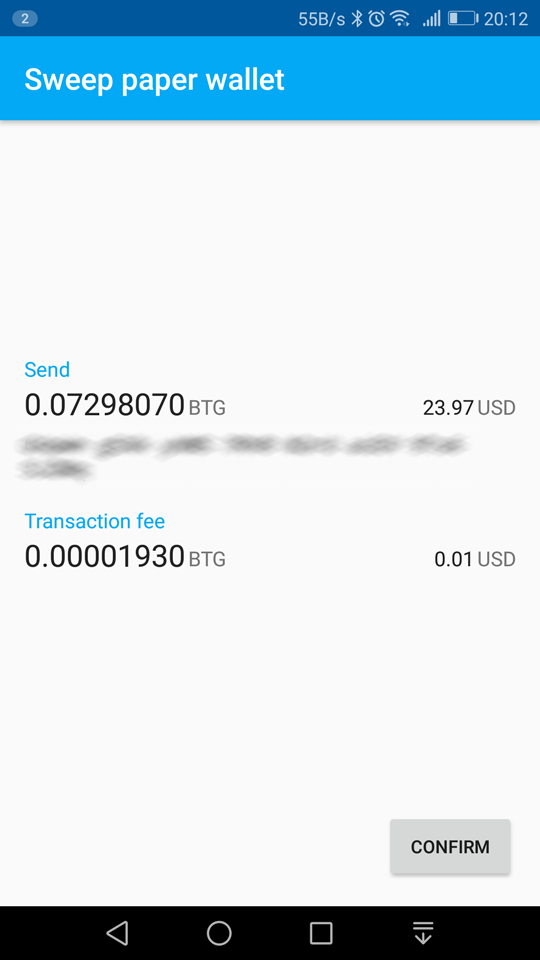
- The Coinomi app will process it for a couple of seconds and either say ‘The private key does not contain any funds’, or tell you what balance is available and ask you to confirm swiping it.
- When you confirm the sweep, Coinomi creates a transaction and transfers your Bitcoin Gold into a different address.
- Go back to your shortlist, mark the private key as processed, and repeat steps 2-7 as many times as you have private keys.
Remember how I told you that the address/key pairs are listed by order of generation and that it would become important? If you kept the same order of keys when you created your shortlist file, you will sweep oldest keys first, and if you have followed the good practice of not reusing addresses, these will most likely be empty.
That is why you might want to save some time by inverting the sweep order for receive keys and go with the newest entries first. As soon as you hit an empty used address, this probably means all older used addresses are empty. However note that the same cannot be applied to change addresses, because these are used in a more random way.
The point is, if you run through the shortlist starting from the oldest entries on top, it is almost 100% likely the first addresses you sweep will turn up empty. Just keep trying the rest of the keys until you strike, ahem, Gold 🙂
If you did everything as described in this blog post and the Coinomi support article linked above, you should have been able to obtain all of your Bitcoin Gold. Did you manage? Let me know in the comments below.

I am a small business owner from Bulgaria. I have been tinkering with personal computers ever since I was a kid. I feel enchanted by Bitcoin technology; last time I felt this excited was some 23 years ago when I first started surfing the internet using a 28.8k modem.
