NiceHash users know that withdrawing bitcoins from their local wallets, especially when small amounts are involved, has always been costly. Thankfully, it is now possible to withdraw your NiceHash balance to another wallet without paying a single satoshi.
In late 2017 NiceHash announced a partnership with Coinbase that would allow NiceHash customers to withdraw directly and instantly from their local wallets into a Coinbase account. Shortly afterwards NiceHash got hacked, and even when they resumed operation, that Coinbase integration never worked for one reason or another (e.g. hitting some sort of daily transaction limit). Today I noticed that this withdrawal method was once again enabled and since it was marked as ‘experimental’) I decided to, well, experiment with it.
Free Bitcoin Withdrawal from NiceHash
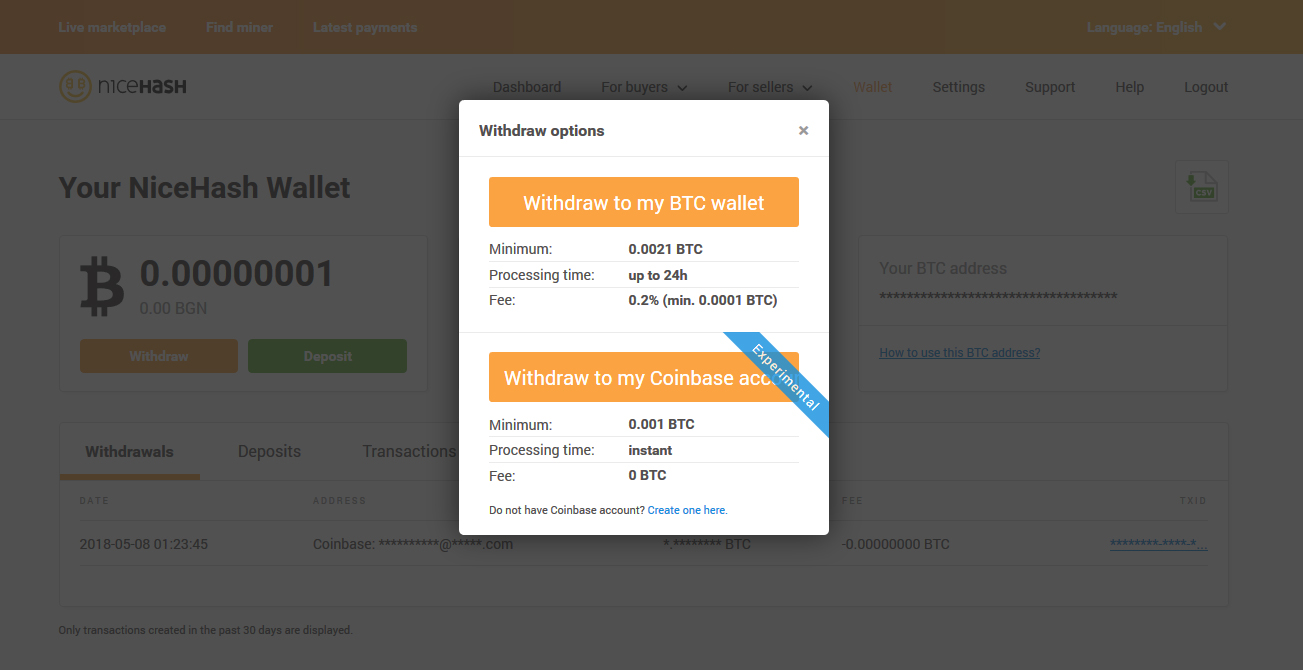
As outlined by the nice pop-up window, withdrawal to Coinbase has several advantages over withdrawing to your own external wallet:
- 0.001 BTC minimum amount
- No network fee
- Instant transfer
This is possible because withdrawals are not processed as blockchain transactions but rather as simple balance updates that are settled between the two entities at a later date that users don’t have to care about. Coinbase is a good off-ramp for those who want to sell the bitcoins earned from NiceHash, but true HODLers — like this author — are able to withdraw to their wallet for free using Coinbase and their sister site, GDAX.
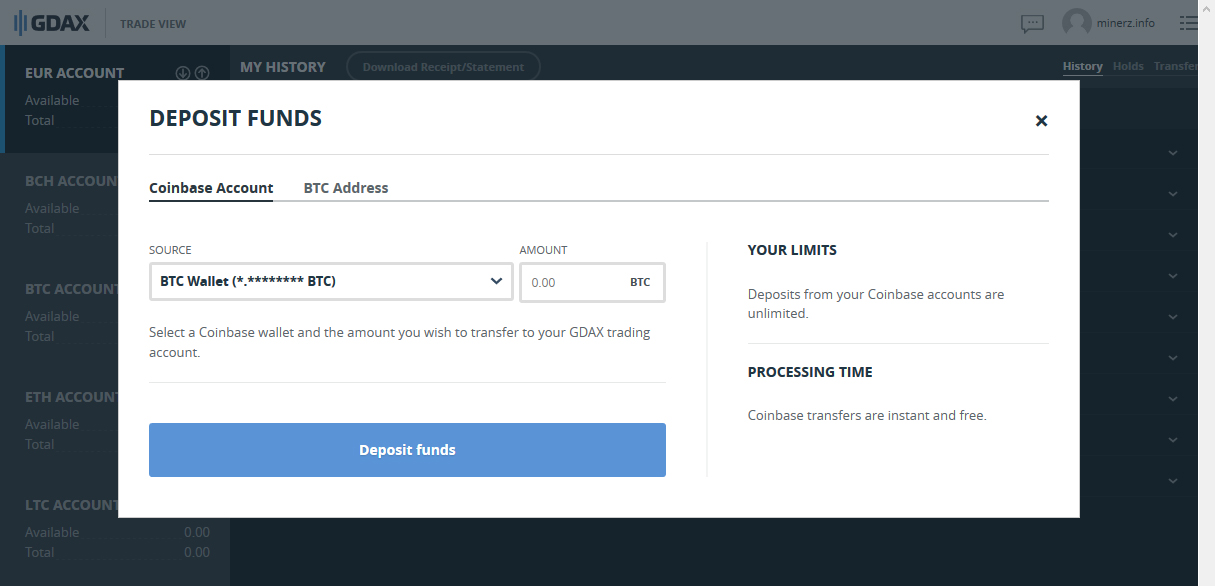
Free Bitcoin Withdrawal from Coinbase (via GDAX)
If you don’t know how to access your Coinbase funds from GDAX, here is how to do it:
- Log into your GDAX account (if you don’t have one, you can create one using your Coinbase credentials and skip authentication/KYC)
- Click on the menu in the upper right corner and select ‘Accounts’
- Once there, click on the down arrow next to your BTC account (not BCH!!!)
- In the withdraw window, select ‘Coinbase account > BTC wallet’ and enter the amount of bitcoins you want to transfer. Here is how this looks so far:

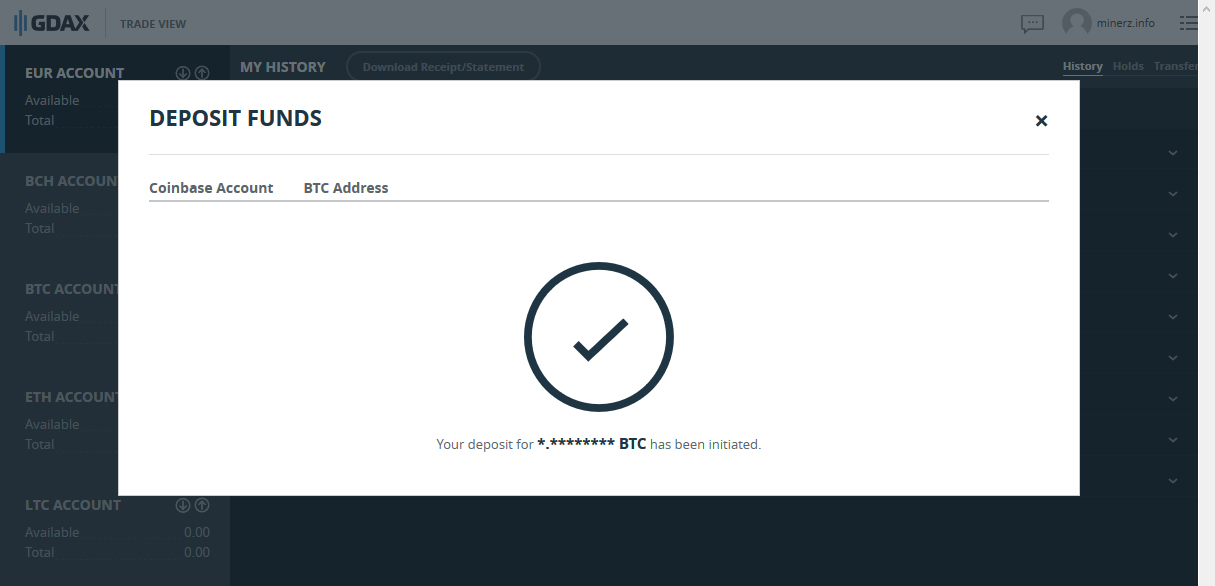
This transfer is once again instant, and if you close the ‘Deposit funds’ window and click once more on your BTC account, you will see the transaction. However to withdraw the bitcoins, you now have to switch to Trade view by clicking on the GDAX logo in the upper left corner of each window and pressing the ‘Withdraw’ button:
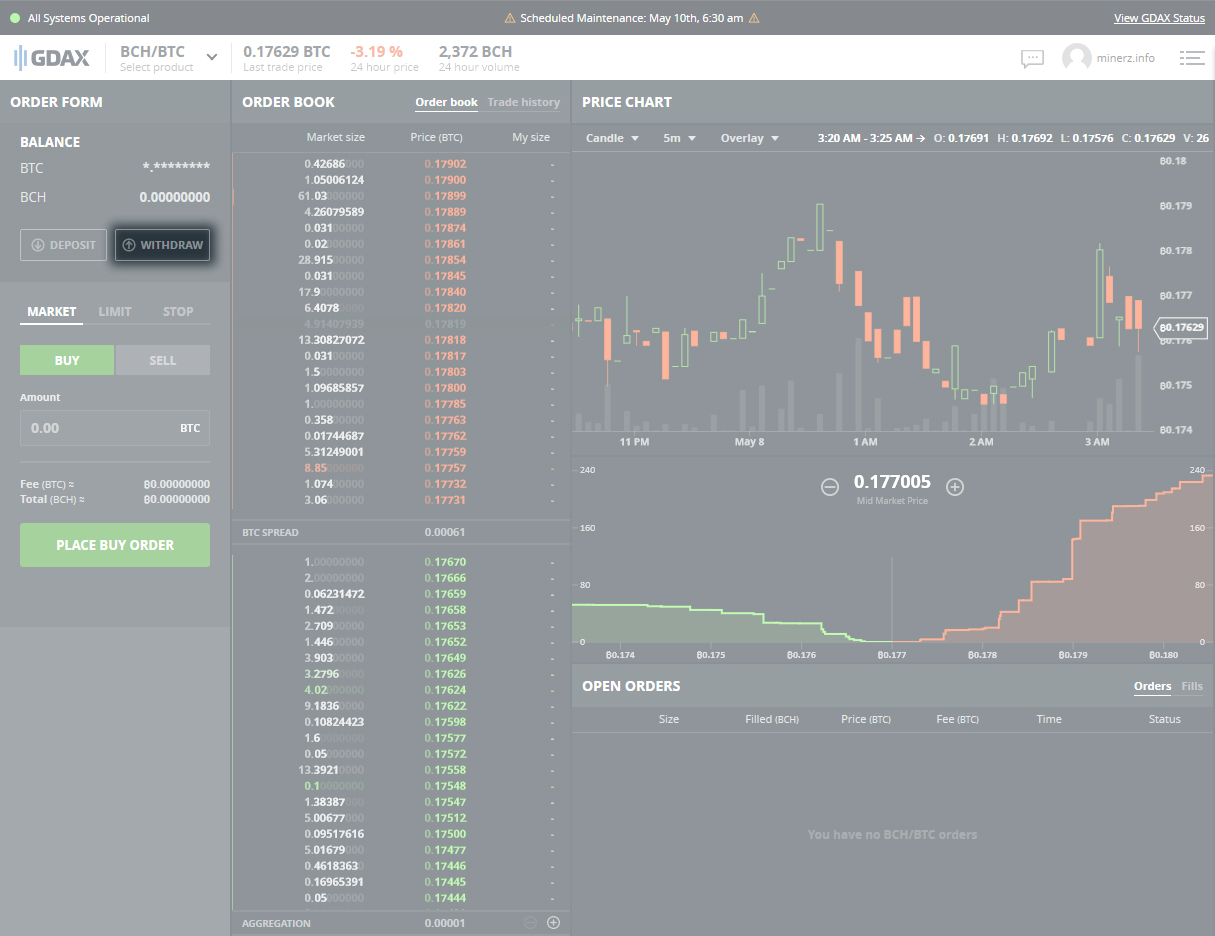 Withdrawing your money from the trade window. Go figure.
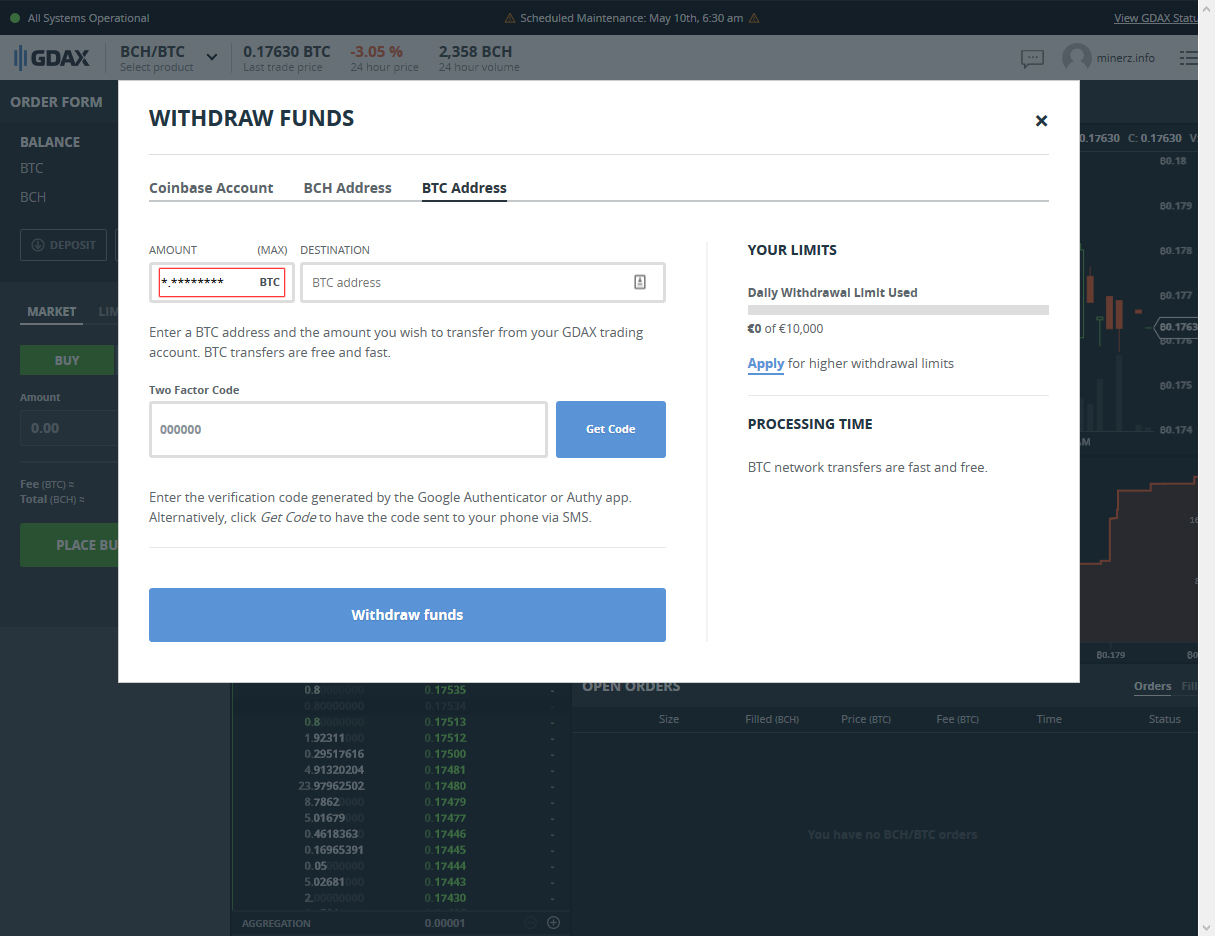
During the next step be extremely careful to select your Bitcoin (BTC) balance and to send the bitcoins to your Bitcoin (BTC) wallet address. Both Coinbase and GDAX are pushing Bitcoin Cash (BCH) very aggressively and you must not get confused because if you send Bitcoin to a Bitcoin Cash account, you will lose this money.
In the ‘Withdraw Funds’ window, go to the ‘BTC Address’ tab and type the amount you want to withdraw, or just click on (MAX) to enter the full available amount. Go to your wallet, generate a new BTC address, and paste it here. Enter your 2FA code and click ‘Withdraw Funds’. Done.
In Conclusion
So the reason of this blog post is to confirm that at present NiceHash makes it possible to withdraw from your local wallet without paying any fees, and to guide you through the process, which is not that complicated but does involve a couple illogical steps.
On NiceHash side, things are quite simple and I only have a small objection about their interface1.
When you click on the ‘Withdraw to my Coinbase account’ button, you are asked to enter your Coinbase account ID (if you don’t have a- Coinbase account, now is a great time to follow my referral link and make one — it will earn both you and me $10 worth of bitcoins as long as you use Coinbase to buy or sell $100 worth of bitcoins within 6 months from joining.
Once you do that, the NiceHash website asks you for your 2FA withdrawal authorisation code and two other one-time codes, called ‘Confirmation code 1’ and ‘Confirmation code 2’. My problem with this arrangement is that it isn’t immediately clear that these two codes are sent to two different accounts: Confirmation code 1 goes to your NiceHash email and Confirmation code 2 goes to your Coinbase email.
For most people this distinction wouldn’t matter, because most people will foolishly the same email account as their login ID for NiceHash, Coinbase and every other goddamn website. Apparently the NiceHash developers have made that assumption and that is why they did not deem necessary to clarify where to expect to receive both codes. But for people who want to be more careful with their money, this instruction means having to figure out both NH and CB mailboxes need to be checked for withdrawal codes.
Perhaps after NiceHash answer enough support tickets from people who didn’t get their Confirmation code 2, they will figure out that the interface is a bit confusing. Hopefully then they will rename the two email authorisation codes to ‘NiceHash confirmation code’ and ‘Coinbase confirmation code’ so that people know which one is which, and everybody will be happy.
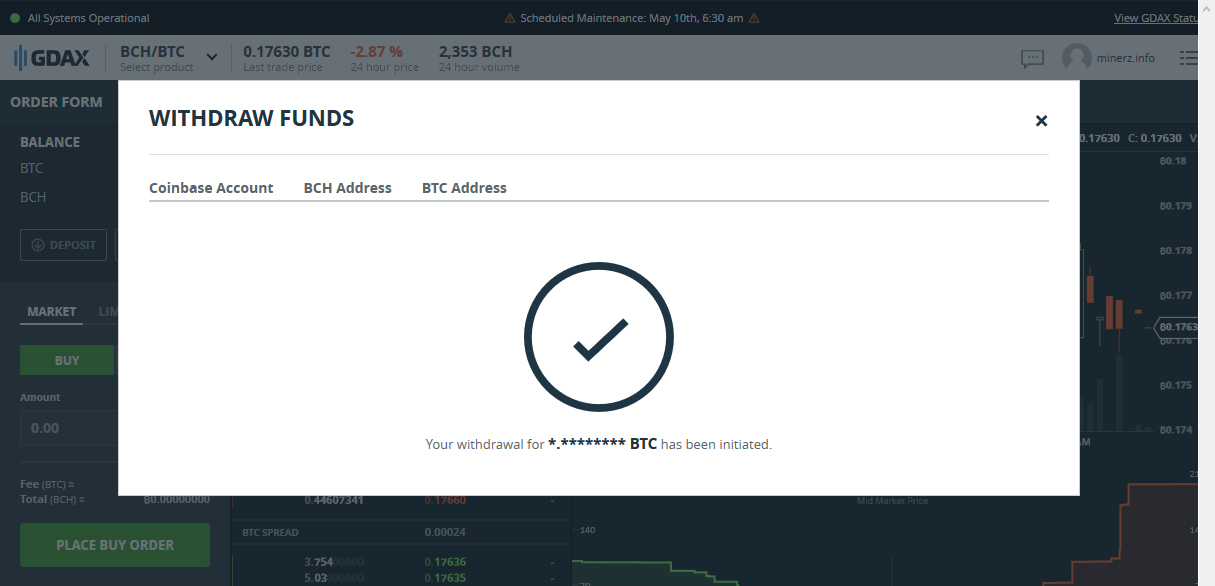
But hey, the bottom line is that this thing works as expected. I got my bitcoins at my Coinbase account as soon as I hit that ‘Send’ button, and from there I went to my GDAX account and sent them to my hardware wallet without paying a single satoshi along the way.

I am a small business owner from Bulgaria. I have been tinkering with personal computers ever since I was a kid. I feel enchanted by Bitcoin technology; last time I felt this excited was some 23 years ago when I first started surfing the internet using a 28.8k modem.
